 English
 usheenthermal

How to Measure and Select the Right Thermal Pad Thickness for Any Build
Somewhere between your GPU running hotter than a summer barbecue and your voltage regulators gasping for airflow, thermal pads will play a crucial role, but thermal pad thickness will determine their thermal conductivity efficiency. Choosing the wrong thickness could lead to component burnout, warranty returns, and an inbox full of emails asking, "Why did this thing melt?"
“Most misfires in thermal management aren’t about the materials—they’re about measurement,” says Alexis Huo, Lead Systems Engineer at Sheen Electronic Technology (2024 Shenzhen Thermal Interface Symposium). You don’t need a lab coat to get it right—but you do need to stop eyeballing gaps like you're frosting a cake.
Choosing the Right Thermal Pad Thickness for Optimal Builds
Dialing in the right thermal pad thickness can be the difference between smooth performance and thermal throttling. Let’s break down what makes or breaks that cooling layer.
Essential Material Types for Thermal Pads
Choosing materials isn’t just about softness—it’s about matching your setup’s heat load.
.webp "Silicone Thermal pad")
.webp "graphite Thermal pad")

- Silicone rubber: Flexible, durable, and ideal as a general-purpose thermal interface material.
- Graphite sheets: Lightweight, ultra-thin, with high thermal conductivity, perfect for compact spaces.
- Ceramic-filled pads: High-end options that balance flexibility with excellent heat transfer.
- Polyimide films: Used in extreme environments due to their resistance to high temperatures.
Each one plays differently depending on whether you’re cooling a GPU, CPU, or power module.
Applications of Thermal Management in Electronic Cooling

Thermal management is more than just slapping on a pad—it’s about keeping your components alive and kicking under pressure.
You’ll find these pads doing heavy lifting inside laptops, LED drivers, EV battery packs, and telecom base stations. Why? Because every millimeter of air gap can create unwanted resistance—something good pad design eliminates fast. A well-fitted pad acts as both a gap filler and a thermal bridge across uneven surfaces.
Optimal Thickness for Integrated Circuits vs Power Amplifiers
Different devices = different needs when it comes to thermal pad thickness.
— Integrated circuits usually sit flush on flat surfaces; they need thinner pads (0.3–0.5 mm) to minimize added thermal resistance.
— Power amplifiers often have irregular heights and require thicker pads (1–2 mm) to ensure full contact without crushing delicate internals.
Get this wrong? You’ll either over-compress or under-contact—and both kill efficiency.
Thermal Conductivity Ratings and Their Impact on Performance
When it comes to heat transfer, numbers matter—but so does context.
Shorter paths + higher-rated materials = faster dissipation. For instance:
- Pads rated at >10 W/mK are typically used in servers or industrial boards.
- Mid-range ones (~5 W/mK) work well for gaming rigs.
- Lower ratings (<2 W/mK)? Fine for low-power sensors or consumer gadgets with minimal heat load.
But remember—higher conductivity doesn’t mean better if the fit is off. Pairing the right material properties with proper thermal pad thickness ensures peak system stability without overheating risks.
And when you’re aiming for precision builds? Brands like Sheen Electronic Technology make it easier by offering custom-cut solutions tailored to your exact component layout and pressure profile, complemented by ESD anti-static gloves for safe handling.
3 Key Factors to Consider When Choosing Thermal Pad Thickness
Picking the right thermal pad thickness isn’t just about plugging a gap—it’s about dialing in performance, safety, and long-term reliability. Let’s break down what really matters.
Evaluating Operating Temperature and Viscosity Range
Different setups run hot or stay cool depending on the load. You’ll want thermal pads that can handle your system’s highs and lows without breaking down.
- Check your component specs—some GPUs spike over 90°C under full load.
- Choose pads with a wide operating temperature range, like -40°C to +200°C.
- High-temp stability ensures no slippage or melting during peak use.
- Don’t ignore viscosity—thicker materials might not flow well at lower temps, leading to poor contact.
If you’re unsure, Sheen Electronic Technology offers options tested for extreme environments—perfect for demanding builds.
Understanding Dielectric Strength's Role in Thermal Pads
Dielectric strength isn’t just some fancy spec—it’s your insurance against short circuits when thermal pads touch exposed traces or components.
- Look for dielectric values above 5 kV/mm for high-voltage areas.
- Lower-rated pads can still work—but only if there's no risk of electrical contact.
- For multi-layer boards or tight VRM zones, don’t skimp on insulation quality.
- A higher dielectric rating doesn’t mean lower thermal performance; modern materials balance both.
As highlighted by TechInsights' Q1 2024 report, "The failure rate of thermal interface materials lacking proper electrical isolation has increased by over 27% year-over-year."
The Importance of Curing Time in Material Selection
Some thermal interface materials need time to cure before reaching full effectiveness—but that delay could mess with your build schedule if you’re not ready for it.
Choose based on:
- Application timing – Are you installing hundreds of units daily or just one?
- Storage conditions – Some pre-cured pads degrade fast once unpacked.
- Mounting method – If pressure is applied immediately post-installation, uncured types may shift under stress.
Pre-cured options are convenient but might lack adaptability across uneven surfaces compared to slower-curing ones that conform better over time.
In short, don’t let curing be an afterthought—it could mean the difference between solid heat transfer and thermal throttling later on.
How Do You Measure Thermal Pad Thickness Accurately?
Getting thermal pad thickness right isn’t just about numbers—it’s about squeezing out every bit of cooling performance your hardware can offer. Here’s how to do it with precision.

Techniques for Accurate Thermal Resistance Measurement
Measuring thermal resistance sounds technical—and it is—but there are clear ways to get it done without playing guessing games.
- Precision instruments like thermocouples and infrared cameras help detect minor variations in heat flow.
- Using a controlled test bench setup, you can simulate real-world usage and monitor how different thermal pad thickness values affect temperature.
- Always maintain stable ambient conditions during testing to isolate the pad’s impact on heat transfer.
- Don’t forget the role of proper mounting pressure; uneven force skews results and messes with your data.
Even small changes in compression ratio or pad contact area can swing your readings wildly. That’s why repeatability matters more than just raw numbers when evaluating thermal performance.
Key Tools for Performance Evaluation of Thermal Pads
You wouldn’t check tire pressure with a ruler, right? Same logic applies here—use tools made for the job.
- Thermal imaging cameras: Spot uneven heat spread caused by incorrect pad placement or poor contact pressure.
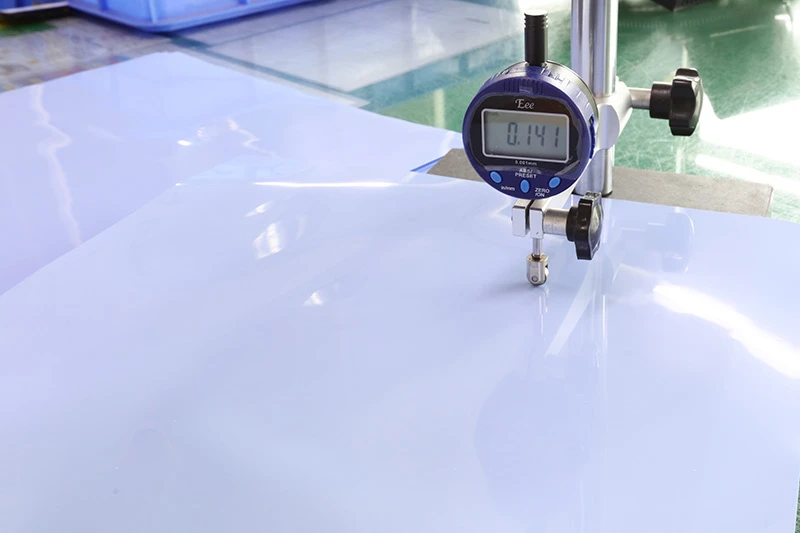
- Digital calipers: Measure actual compressed thermal pad thickness, especially after installation.
- Environmental chambers: Simulate high-temp cycles to test long-term reliability under stress.
- Load testers: Apply consistent force across components to evaluate how well pads handle real mounting conditions.
Grouping these tools helps diagnose whether poor cooling is due to bad material, wrong fitment, or just mismatched expectations. It’s all about dialing in optimal heat dissipation, especially when you're working with tight spaces like M.2 SSDs or stacked VRMs where every millimeter counts.
Thin vs Thick: Navigating Thermal Pad Thickness Choices
Choosing the right thermal pad thickness is like tuning an engine—you need precision, not guesswork.
Thin Thermal Pads for Memory Modules
- Thin thermal interface materials are ideal when space is tight and performance is non-negotiable.
- These pads typically range from 0.2mm to 0.5mm, ensuring minimal gap filling while maximizing contact with memory chips.
They offer low thermal resistance, which helps keep DRAM modules cool under load. Sheen Electronic Technology’s ultra-thin solutions strike a clean balance between compression and thermal efficiency—no overkill, just smart cooling.
Thick Thermal Pads for Voltage Regulators
When it comes to beefy VRMs, thick pads are your go-to fix.
- They can span gaps up to several millimeters thanks to higher pad dimensions, making them perfect for uneven surfaces.
- Thicker pads also absorb vibrations better and provide stable heat transfer over time.
- However, they may introduce slightly higher thermal resistance, so choose wisely based on power density.
Here's a quick comparison:
| Application Area | Recommended Thickness | Compression Rate | Typical Power Load |
| GPU VRMs | ≥2.0 mm | Medium | High |
| Motherboard MOSFETs | ~1.5–2 mm | High | Moderate–High |
| PSU Components | ≥2.5 mm | Low | Very High |
The trick? Match the pad's squish factor with your mounting pressure—don’t just eyeball it.
Confused About Thermal Pad Thickness? Here’s Your Solution
Picking the right thermal pad thickness isn’t rocket science, but it sure can feel like it. This guide clears up the fog with practical advice and zero fluff.
Addressing Common Myths About Thermal Pad Thickness
Myth-busting time—because bad info can mess up your cooling game fast.
- Thicker is always better? Nope. Too thick a pad can reduce contact pressure, leaving you with nasty air gaps that kill heat transfer.
- People think all pads compress the same way, but different materials have different compression ratios—some squish more than others.
- A common myth says pads don’t need exact sizing if they "sorta fit." Wrong again: too thin won’t fill the gap; too thick risks component damage.
- Some assume thermal paste and pads are interchangeable—they’re not! Pads act as a gap filler, while paste is for near-flush surfaces only.
- "It doesn’t matter how old the pad is." Actually, age affects its pad properties, especially elasticity and conductivity over time.
Simplified Guide to Choosing the Right Thickness for Your Build
Choosing your perfect-fit pad doesn’t need a PhD—just a bit of know-how.
- Start by measuring your component gap using tools like a feeler gauge, digital micrometer, or even the classic putty method.
- Check your hardware’s manual or datasheet for any recommended pad specs—they often list ideal thickness and suggested materials.
- Consider compression: most pads compress around 20–30%. So if you measure a gap of 1mm, aim for a pad around 1.2–1.5mm thick.
- Match your material to your needs: high-performance builds might require higher thermal conductivity, while general use can go with basic silicone types.
- Don’t forget about mounting pressure—too much force on an oversized pad leads straight to warped boards or cracked chips from uneven contact.
| Measured Gap | Suggested Starting Thickness | Typical Compression Target | Best Fit Applications |
|---|---|---|---|
| 0.15–0.30 mm | 0.3 mm | 10–20% | Memory modules, SSD controllers, flat IC surfaces |
| 0.35–0.70 mm | 0.5 mm | 15–25% | Compact GPUs, small power devices, low-profile boards |
| 0.80–1.20 mm | 1.0 mm | 20–30% | General-purpose electronics, laptop internals, mid-gap assemblies |
| 1.30–1.80 mm | 1.5 mm | 20–30% | VRMs, MOSFETs, power modules, uneven component heights |
| 1.90–2.50 mm | 2.0 mm | 20–35% | PSU sections, large gap-filling needs, vibration-prone assemblies |
If your measured gap falls between two sizes, choose the option that achieves firm contact without excessive compression. Too much compression can reduce pad life; too little can leave air gaps and raise thermal resistance.
According to TechInsights' Q2 Thermal Interface Materials Report (2024), improper thickness selection accounts for over “35% of thermal inefficiencies” reported by PC builders globally—a stat that proves precision matters.
When you're stuck between sizes, go slightly thicker only if you're sure there's enough room—and always double-check after installation to avoid performance dips caused by poor contact or trapped air pockets.
And hey, don’t guess your way through this—your system's temps depend on getting that tiny detail just right!
Need exact numbers before you choose? Download the datasheets for thermal pads, thermal interface materials, and related products on Datasheet page to review thickness options, conductivity values, operating temperature ranges, and dielectric performance.
Need Help Matching Thickness to Your Build? Send us your stack-up drawing, measured gap, or target application, and we can help recommend the right thermal pad thickness for your device. [Request a Thickness Recommendation]
FAQs about Thermal Pad Thickness
1. How does thermal pad thickness influence electronic cooling?
Thicker layers bridge wider gaps on heat-generating components like power amplifiers and voltage regulators, while thinner ones ensure closer contact for integrated circuits or memory modules.
· Ideal pairing delivers balance between heat transfer stability and mechanical setup tolerance.
· Overly thick silicone rubber pads can trap air pockets, increasing thermal resistance measurement results.
2. Which materials help sustain precise temperature control in demanding systems?
Different tasks call for different heroes of conductivity:
· Graphite sheet: rapid spread of heat across compact devices in consumer electronics; suitable when space is tight.
· Silicone rubber pad: flexible and resilient for industrial equipment or automotive electronics under vibration stress.
· Thermal adhesive & epoxy resin: strong bonds where reliability outranks removability during continuous use.
3. Why should dielectric strength matter during selection?
It keeps microprocessors safe from electrical leakage while keeping thermal management stable under load peaks—especially crucial across telecommunications infrastructure running 24/7 power cycles.
| Attribute | Effect | Safety Benchmark |
| Dielectric strength | Insulation integrity | UL standards |
| Operating temperature | Thermal endurance up to +150°C | Material safety data sheets compliance |
In short, insulation quality ensures that performance never sacrifices protection.
4. How can engineers verify exact padding thickness before mass application?
Precision defines repeatability:
1️⃣ Digital micrometers gauge uniform spacing post-lamination stage; adoption rate near 1%.
2️⃣ Environmental simulation confirms deformation behavior under real-world heating and vibration loads.
3️⃣ Reliability testing ensures each batch aligns with ISO certification protocols before assembly begins.
5. Does a thicker layer guarantee better heat dissipation every time?
Not always—it’s a fine tension between compression pressure and contact resistance:
☆ Excess material reduces efficiency by extending the conduction path even with high-conductivity graphite sheets or pastes.
☆ Correct pairing enhances both temperature control precision and long-term durability within specified viscosity range limits.
Summary line — The art lies not in more material but the right fit woven through every micron of clearance.
6. What kind of testing keeps large-scale builds dependable over time?
· Dependability breathes through trials that simulate reality step-by-step:
· Accelerated aging checks if adhesives hold steady beyond their rated curing time windows.
· Performance evaluation contrasts operating temperature response against expected thermal conductivity ratings.
· Final release only after RoHS compliance, REACH certification, then cross-audited via ISO documentation to seal production trustworthiness period after period.


