
 English
 usheenthermal

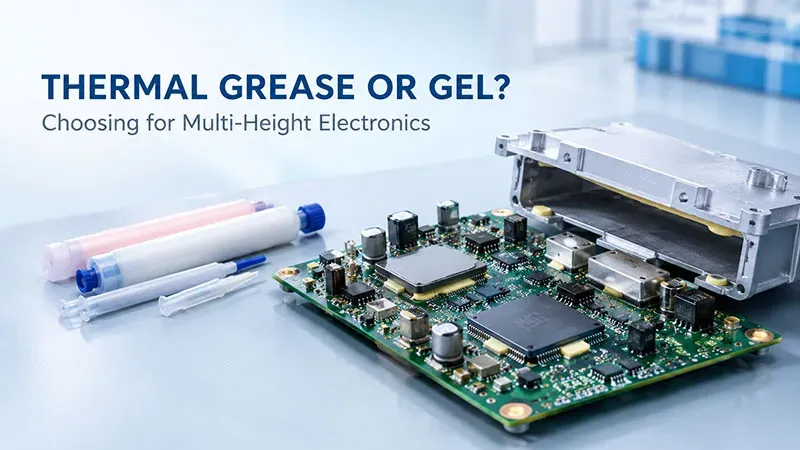
Let's start with a familiar scene. One PCB carries a processor, a few power devices, and some inductors. None of them sit at exactly the same height. The housing is not perfectly flat either. This is when a simple thermal-pad design can turn into a small part-number jungle.
Could a paste-like thermal material make life easier? Often, yes. You can dispense it where it is needed and let it conform to several different heights. But it does not magically fix an inconsistent process. If the shot size, contact, or final interface thickness changes from unit to unit, the thermal result will change with it.
This guide looks at the practical selection path for Sheen SG560 thermal grease, SE single-component gels, and SE-AB two-component gels. The goal is simple: match the material to the gap, then make sure the production line can use it the same way every time.
First, decide what job the material has to do
Conductivity is usually the first number people circle on a datasheet. It is not the first question to ask. Start by describing the interface itself:
- Create a thin thermal path between surfaces that can be pressed together.
- Fill a larger or less predictable gap between a component and a housing.
- Adapt to uneven surfaces or an assembly that cannot take much mechanical load.
- Provide a defined cure or some attachment after dispensing, if the design needs it.
These jobs overlap a little, but they are not the same job. A grease that works nicely in a thin, compressed interface should not be treated as a deep-gap filler just because adding more material is easy. A gel that cures or adheres should not automatically be called a structural adhesive either. The exact model data still matters.
For an initial screen, the three routes can be laid out like this:
| Material route | Where it fits | Questions to answer |
|---|---|---|
| SG560 thermal grease | Thin interfaces that can be properly compressed | Coating amount, final interface thickness, pump-out, bleed-out, and thermal resistance after temperature cycling |
| SE single-component gel (SE20 / SE30 / SE40) | Different component heights, more complex surfaces, or load-sensitive assemblies | Dispensing behavior, wetting, gap hold, and actual component temperature under the same interface conditions |
| SE-AB two-component gel (SE200AB / SE300AB) | Applications where the material is mixed and then cured | Mix-ratio basis, mixing uniformity, working time, cure conditions, and any required adhesion checks |
One small naming detail is worth keeping straight: single-component and two-component describe the way the material is supplied. They do not, by themselves, tell you how a particular model cures. Check the exact grade's storage, cure, and processing instructions before you lock in the process.
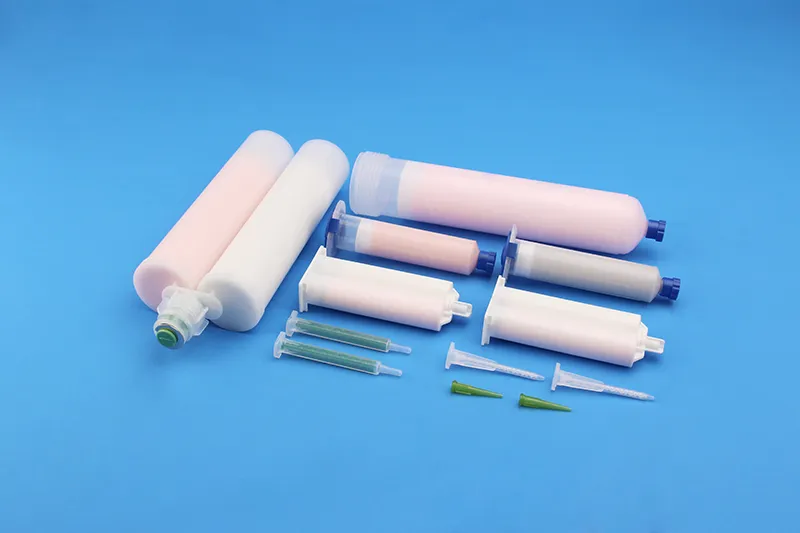
Figure 1 — Sheen gel syringe packaging and dispensing example. Single-component, two-component, and curing requirements depend on the specific model.]
When grease is the easy answer—and when it is not
SG560 is the route to look at when the surfaces can meet fairly closely and the assembly can provide enough compression. Before calling it a good fit, answer three very ordinary questions:
- How much material actually lands on each unit?
- What is the final interface thickness after the assembly is pressed together?
- After temperature cycling, do pump-out, bleed-out, or thermal resistance change?
The height of a wet bead is not the finished bondline thickness. That distinction causes trouble surprisingly often. If the gap is large, simply adding more grease is not a shortcut. You still need to know whether the material stays put and keeps the surfaces in contact.
A single-component thermal gel is often a more natural direction when component heights vary, surfaces are more complicated, or the assembly cannot tolerate much load. The Sheen SE family is identified for this kind of gap-filling evaluation. Its conformability and wetting behavior may help one dispensing process reach several different locations, and it may reduce the number of custom pad shapes the team has to manage.
Will that really save time? Measure it. Put the dispensing cycle next to the pad-placement time, tooling, and error-proofing needed for the alternative. The winner is the one that works on the actual line, not the one that sounds simpler in a meeting.
The nominal thermal conductivity values listed for SE20, SE30, and SE40 are 2, 3, and 4 W/m·K. A higher number can look attractive, but it does not automatically mean a cooler component. Compare the same gap, coverage, compression, heat load, and cooling conditions before drawing that conclusion.
If the application needs material to be mixed and then cured, SE200AB and SE300AB can enter the evaluation. This route brings a few extra checks along for the ride:
- Is the mix ratio controlled by mass or by volume?
- Is the mixture uniform throughout the usable working time?
- Are the cure conditions realistic for the production line?
And keep this boundary clear: adhesion or cure is not the same as structural bonding. If the material has to hold a component in place, check bonding strength and the actual structural requirement separately.
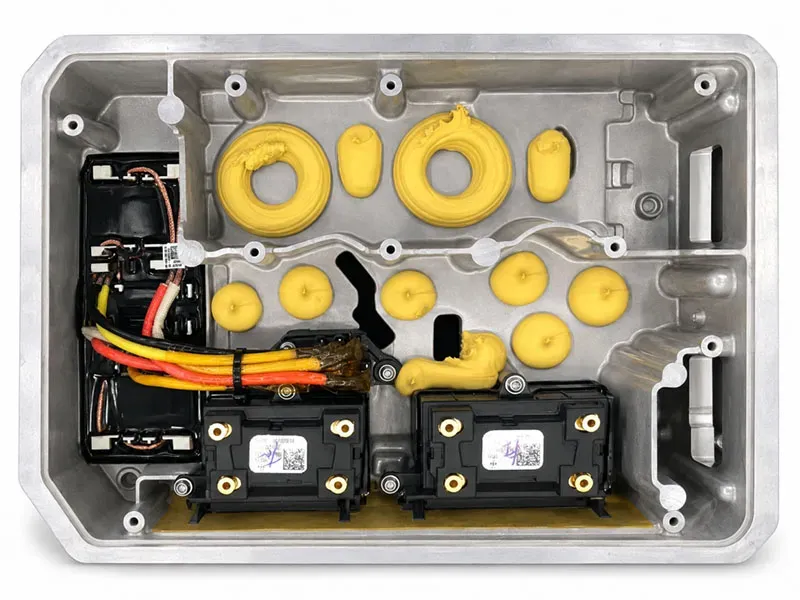
Figure 2 — Dispensing and gap-filling interface inside an OBC. The photo is an application example; material selection still depends on the actual design and process.
For optical modules, thermal performance is only half the conversation
Optical modules bring another guest to the discussion: cleanliness. Public materials from Dow describe TC-3065 and TC-3120 with nominal thermal conductivity values of 6.5 and 12 W/m·K, respectively, while also emphasizing very low volatile content.
The useful takeaway is not simply that one conductivity number beats another. In a high-speed optical module, heat transfer and contamination control may need to be evaluated together. Two gels with different conductivity values do not automatically share the same application boundary.
When screening a Sheen thermal gel for this kind of application, define three things together:
- The material grade.
- The actual interface gap.
- The contamination-control requirement.
Then check the evidence for that exact model: thermal resistance, volatile content, and reliability under the intended conditions. The low-volatility single-component direction in the supplied material is a screening route, not a blanket promise for every grade.
If the customer specifically requires a non-silicone system, evaluate a non-silicone option separately. A low-volatility silicone should not be presented as a direct substitute for a non-silicone material.
There is also a very practical purchasing question: can the material keep its behavior from the warehouse to the nozzle? During sampling, record:
- Syringe or feed packaging.
- Storage conditions.
- Return-to-room-temperature requirements.
- How long the material remains stable in the production environment.
Those details may feel secondary while a sample is sitting on a lab bench. They become much less secondary after a batch change or a line restart. Record them early so a later abnormal result has something concrete to compare against.
Conductivity gets the headline. The nozzle decides whether it survives production.
High-filler formulations often need a closer look at rheology and feed behavior. The exact result depends on the model and the equipment, but these variables can change what actually comes out of the nozzle:
- Nozzle size and geometry.
- Feed pressure and material temperature.
- Dispensing path, speed, and stop-start behavior.
- Stringing, tailing, and clean cutoff at the end of a bead.
A material can pass the thermal test and still fail the production test if it cannot dispense consistently at the target takt time. That's not a material — that's a bottleneck.
For shot quantity, start with the finished interface rather than a convenient syringe setting:
- Estimated fill volume = covered area × target interface gap.
Then tune that estimate with real trials. Look at path length, spreading, trapped air, and edge squeeze-out. Weighing each shot can show whether the dispense is consistent. Teardown can show coverage and missed areas. Neither one alone proves that the interface is bubble-free or that the final thickness is within tolerance.
Measure the compression load as well. A soft material is not the same thing as a zero-load interface. If the enclosure or cover presses on the assembly, check that load and how evenly it is distributed on the actual parts.
For two-component dispensing, use a simple stop-and-restart check:
- Confirm whether the ratio is specified by mass or volume.
- Follow the supplier's mixer recommendation.
- After a stop, inspect the first material out of the mixer for uniformity.
- Check whether the working time has been exceeded and how much material must be purged.
A good sample from a continuously running line does not replace validation after a shift change, material change, or restart. Production has a way of finding the one condition the lab forgot to try.
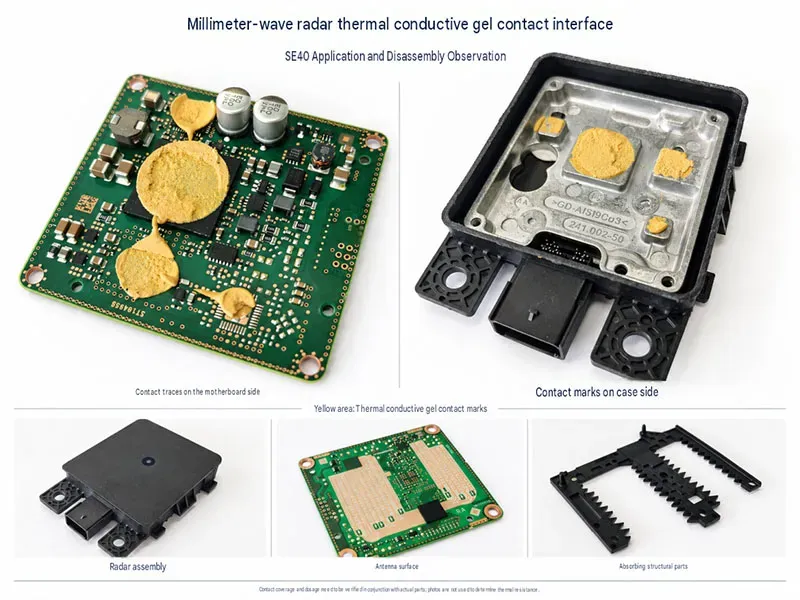
Figure 3 — Actual interface between a millimeter-wave radar mainboard and housing. Final coverage and contact should be confirmed on the real assembly.
One good sample is a start—not a production process
Thermal comparisons only tell a useful story when the important conditions stay the same. Keep these aligned:
- Power and heat sink.
- Clamping method and ambient conditions.
- Temperature measurement location.
- Stabilization time before the reading is taken.
Otherwise, the fixture may be doing as much work as the material, and the comparison will be hard to trust.
Reliability testing should follow the way the product is actually used. Depending on the application, that may mean high-temperature storage, temperature cycling, or damp-heat testing. A vertical assembly raises a sag or flow question. Temperature cycling raises a migration question. A serviceable product also needs a teardown and cleanup check.
When the supply plan is confirmed, keep two records instead of compressing everything into one overall score:
- Material performance window: what the selected grade is designed to provide.
- Process window: how this line must dispense, assemble, cure, inspect, and repair it.
Nozzle, feed pressure, and per-unit shot weight changes belong in process control. The same material can behave differently when the operating conditions drift.
Purchasing should also calculate the cost of a qualified part, not stop at price per kilogram. Include actual usage, leftover waste, changeover cleaning, downtime, and rework difficulty. For two-component materials, check mixer consumption and restart scrap too.
Before asking for a material recommendation, gather these details
The fastest way to get a useful answer is to show the real assembly, not just name the application. Bring these details to the discussion:
- Component height map and target interface thickness.
- Covered area, keep-out zones, and sensitive neighboring parts.
- Mounting direction and the way the housing or cover applies load.
- Dispensing equipment, packaging format, nozzle, and target takt time.
- Power level, temperature range, cleanliness requirements, and repair expectations.
【Request a Custom Quote】With that information on the table, Sheen can screen the material route and use small-batch trials to confirm the model and process settings. That is how the flexibility of a paste-like material turns into a stable production result, instead of remaining a promising sample on a workbench.
Source note: Product names, nominal conductivity values, process cautions, and application boundaries in this article are all based on the Technical Data Sheets (TDS) for Sheen products.